Quick Start
Get started with Teal in minutes. Learn how to install, initialize, and run your first ETL pipeline.
Installation
Install Teal using Go:
go install github.com/go-teal/teal/cmd/teal@latest
Creating Your Project
Create a new directory for your project:
mkdir my_test_project
cd my_test_project
Initialize Your Project
Initialize a new Teal project from scratch:
teal init
This creates the following structure:
❯ ls -al
total 16
drwxr-xr-x@ 6 user  staff  192 24 Jun 21:23 .
drwxr-xr-x  5 user  staff  160 24 Jun 21:21 ..
drwxr-xr-x@ 3 user  staff   96 24 Jun 07:46 assets
-rw-r--r--@ 1 user  staff  302 24 Jun 07:51 config.yaml
drwxr-xr-x@ 2 user  staff   64 24 Jun 20:03 docs
-rw-r--r--@ 1 user  staff  137 24 Jun 07:46 profile.yaml
Update config.yaml
Configure your database connection:
version: '1.0.0'
module: github.com/my_user/my_test_project
connections:
  - name: default
    type: duckdb
    config:
      path: ./store/test.duckdb
      extensions:
        - postgres
        - httpfs
Key Points:
- The
moduleparameter will be used as a module name ingo.mod - Make sure the directory specified in
pathexists
Update profile.yaml
Configure your project profile:
version: '1.0.0'
name: 'my-test-project'
connection: 'default'
models:
  stages:
    - name: staging
    - name: dds
    - name: mart
Note: The name will be used as the binary file name
Generate Go Project
Generate the Go project from your SQL models:
teal gen
You’ll see output showing all the assets being built:
project-path: .
config-file: ./config.yaml
Building: staging.stg_airports.sql
Building: staging.stg_crew_assignments.sql
...
Files 26
./cmd/my-test-project/my-test-project.go ....................... [OK]
./cmd/my-test-project-ui/my-test-project-ui.go ................. [OK]
./go.mod ...................................................... [OK]
...
Important:
- Teal automatically generates
docs/README.mdwith comprehensive project documentation - Your DAG is visualized in the Mermaid diagram file
docs/graph.mmd - Two main.go files are generated:
cmd/my-test-project/- Production binary with Channel DAGcmd/my-test-project-ui/- Debug UI binary with REST API server
Post-Generation Steps
Run go mod tidy to install dependencies.
Run Your Project
Start Development with Hot-Reload (Recommended)
# Start UI server with automatic file watching and hot-reload
teal ui

# Access the UI Dashboard at http://localhost:8081
# API server runs on http://localhost:8080
The teal ui command watches for changes in:
assets/(all SQL models and tests)profile.yamlconfig.yaml
When changes are detected, it automatically:
- Regenerates Go code
- Restarts the API server
- Maintains the same ports
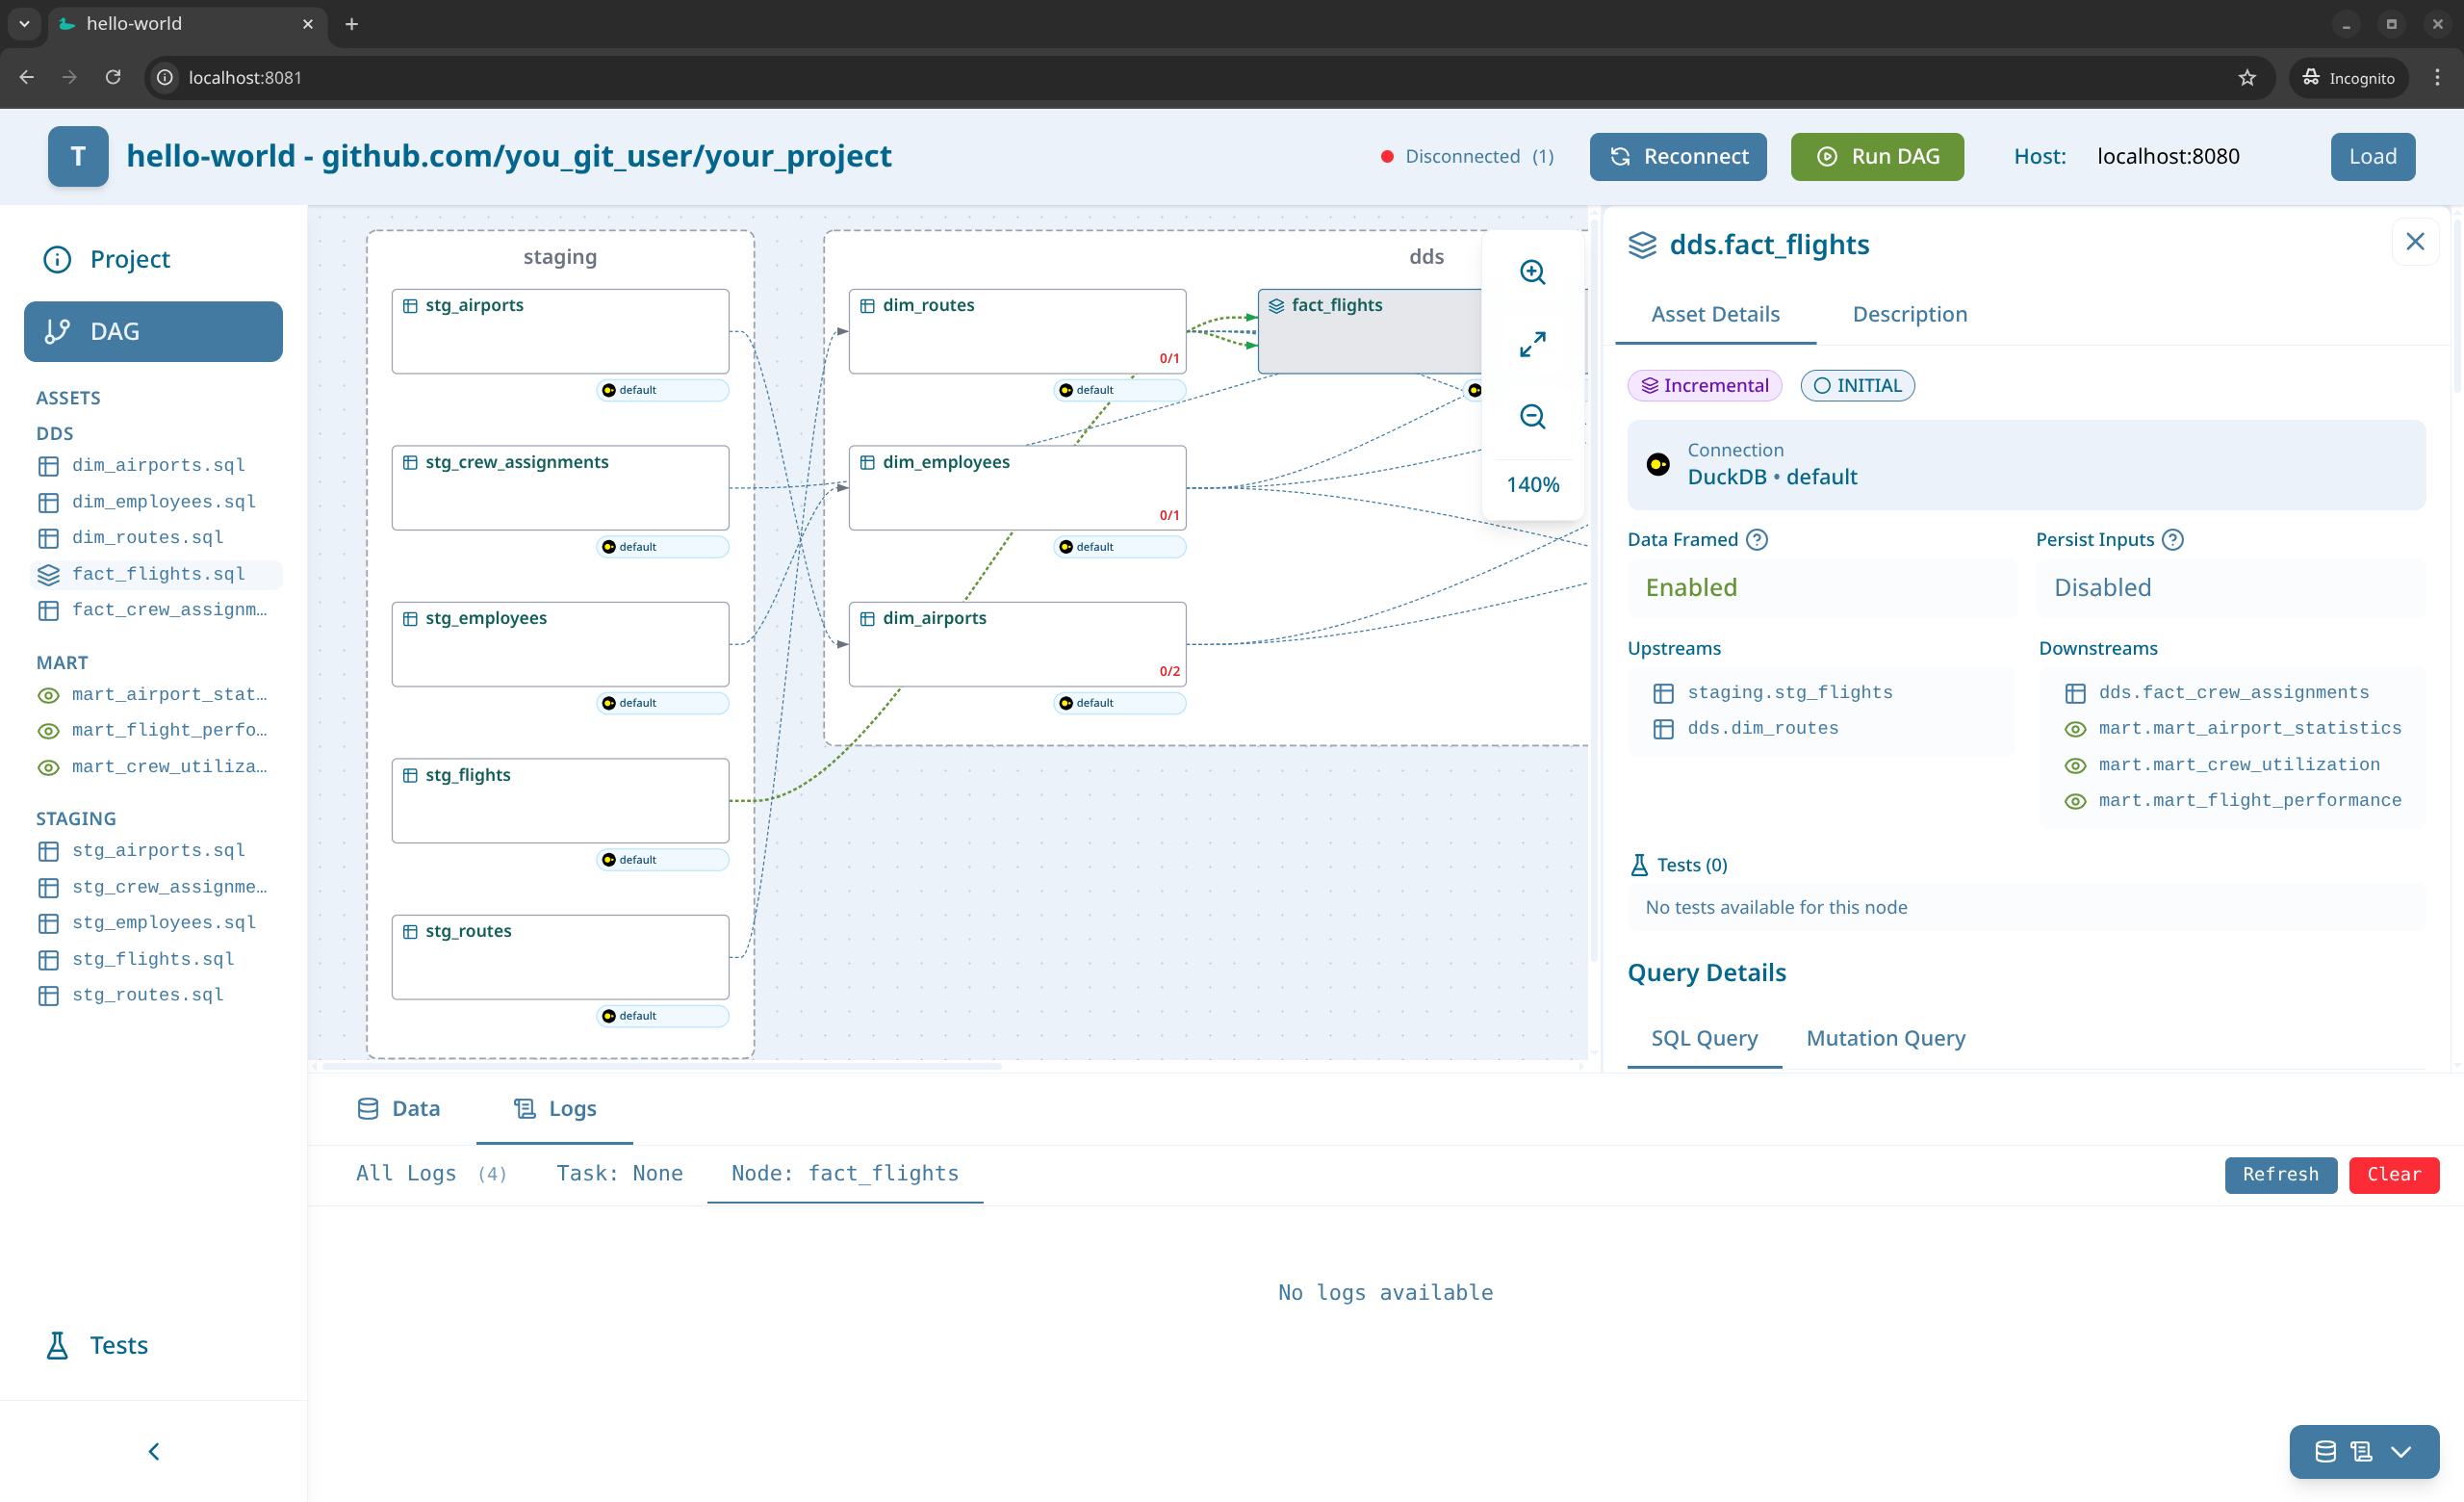
UI Dashboard (http://localhost:8081) provides a visual interface with:
- Interactive DAG visualization
- Real-time execution monitoring
- Test results and data quality checks
- Asset data inspection
- Execution logs
Using Make (Alternative for Development)
The generated project includes a Makefile with the make run command for quick development:
make run
This command performs two steps:
- Regenerates all Go code from your SQL assets using
teal gen - Starts the UI debug server on the default port (8080)
To run on a custom port:
make run PORT=9090
Production Mode
First, build the production binary:
go build -o bin/my-test-project ./cmd/my-test-project/my-test-project.go
chmod +x bin/my-test-project
Then run with various options:
# Basic run with auto-generated task name and tests
./bin/my-test-project

# Run with custom task name
./bin/my-test-project --task-name "etl_batch_001"

# Run with input data and human-readable logs
./bin/my-test-project \
  --input-data '{"source":"api","date":"2024-01-01"}' \
  --log-output raw \
  --log-level info

# Run without tests for faster execution
./bin/my-test-project --with-tests=false

# Production deployment with minimal logging
./bin/my-test-project \
  --task-name "prod_$(date +%Y%m%d_%H%M%S)" \
  --log-level error \
  --log-output json
Debug UI Mode (Without Hot-Reload)
The UI binary is gated behind the teal_ui build tag, so pass -tags teal_ui when running or building it directly (the generated Makefile’s build-ui / run targets already include it). See Build Tags for why.
# Run UI debug server directly (note the -tags teal_ui)
go run -tags teal_ui ./cmd/my-test-project-ui/my-test-project-ui.go

# Run on custom port
go run -tags teal_ui ./cmd/my-test-project-ui/my-test-project-ui.go --port 9090
Command-Line Arguments
For complete CLI command documentation with all flags and examples, see the CLI Commands Reference in the Documentation.
teal ui Command
--port- Port for API server (default:8080). UI Dashboard runs on port + 1 (default:8081)--log-output- Log output format:jsonorraw(default:raw)--log-level- Log level:panic,fatal,error,warn,info,debug,trace(default:info)
Example with custom port:
# API server on port 9090, UI Dashboard on port 9091
teal ui --port 9090 --log-level debug
Production Binary
--task-name- Custom task name (optional, auto-generated if not provided)--input-data- Input data in JSON format (optional)--log-output- Log output format:jsonorraw(default:json)--log-level- Log level:panic,fatal,error,warn,info,debug,trace(default:debug)--with-tests- Run with tests enabled (default:true)
Debug UI Binary (Direct Execution)
--port- Port for API server (default:8080). UI Dashboard runs on port + 1--log-output- Log output format:jsonorraw(default:raw)--log-level- Log level (default:info)
Using Generated Documentation with AI Assistants
The docs/README.md file generated by Teal contains comprehensive project information that can be directly included in AI code assistant contexts:
Claude.ai / Claude Code:
@docs/README.md - Include this file to provide complete project context
Cursor IDE:
Add docs/README.md to .cursorrules or reference: @docs/README.md
GitHub Copilot (VS Code):
Open docs/README.md in a tab or reference: // See docs/README.md
Gemini Code Assist:
Add docs/README.md to workspace context
Example Prompts:
- “Based on @docs/README.md, add a new mart layer asset aggregating transactions”
- “Using @docs/README.md, which database connection should staging models use?”
- “According to @docs/README.md, create an incremental model in the dds stage”
Next Steps
- Read the Documentation to learn about advanced features
- Explore Materializations and Template Functions
- Learn about Data Testing to ensure data quality
- Check out Cross-Database References for multi-database workflows